Team Management
Assemblic is built for collaboration. The Team Management section allows you to control who has access to your projects and what they can do.
Teams allow you to organise your users and projects logically. When you subscribe, you’ll have an initial Team created automatically, named with your email address.
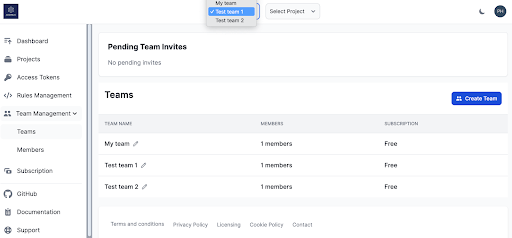
You can see your team in the top dropdown. If you have multiple teams set up, you can also toggle between teams from this dropdown.
Create a new team
To create a new team, click on Team Management, then Teams, and then Create Team.
 Enter a new team name and click **Create Team**.
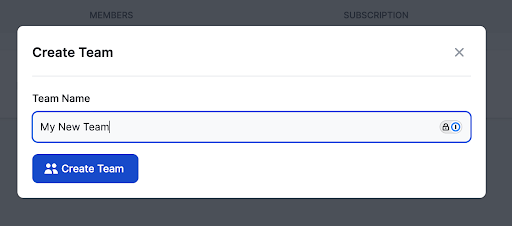
Once you’ve created a new team, it can be accessed via the top dropdown menu or the Team Management/Teams menu.
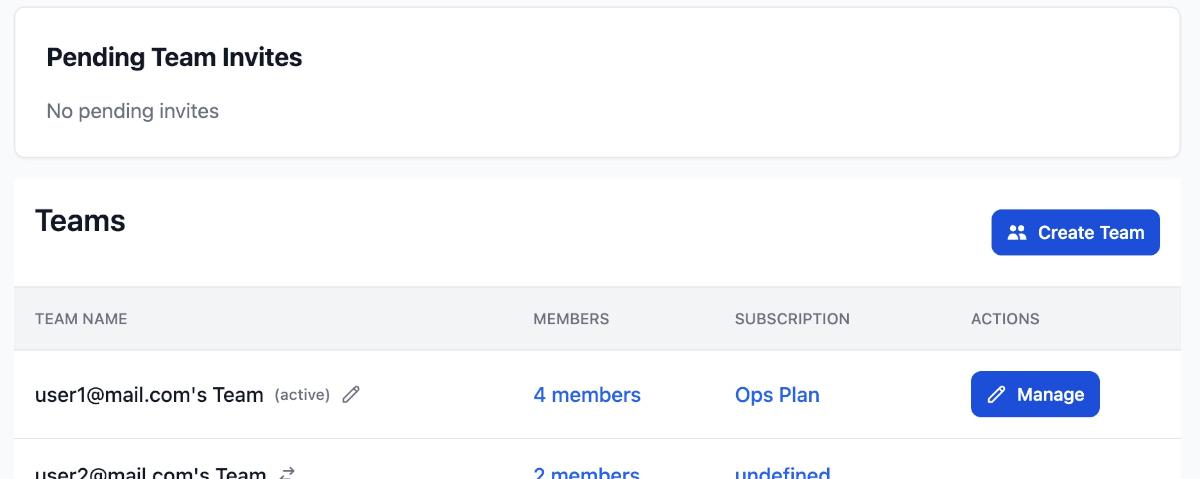
From the Teams area you can manage your team’s settings, including its name, description, and security policies.
- Look for the Manage button (pen icon) next to your team name in the list.
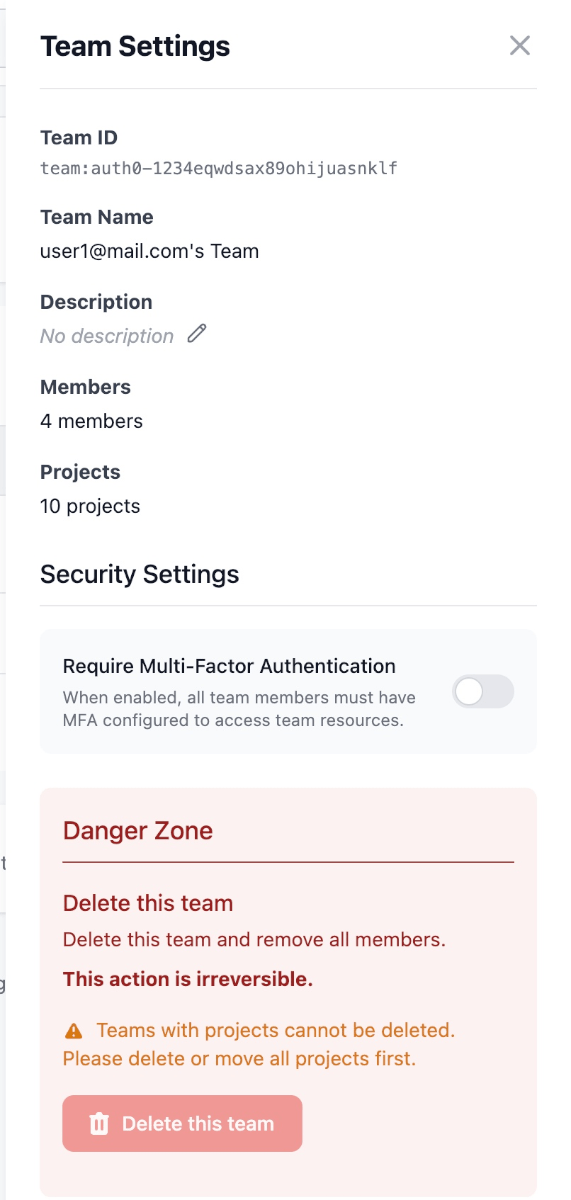
Team Settings
- Name & Description: You can update the team name and add a description to help teammates identify the workspace.
- Delete Team: You can permanently delete a team.
IMPORTANT
Prerequisites for Deletion: A team can ONLY be deleted if it contains no projects. You must delete all projects within the team first. Alternatively, you can select the “Delete all team projects” checkbox to delete all projects in the team before deleting the team. Note, this action is not reversible.
Security & MFA
Assemblic supports robust Multi-Factor Authentication (MFA) to secure your team.
- Enforce MFA: Owners can toggle Require MFA in the team settings.
- Grace Period: Once enabled, all team members will have a 5-day grace period to set up their MFA. After this period, they will be required to enroll to access the dashboard.
- Supported Methods:
- TOTP (Google Authenticator, Authy, etc.)
- Passkeys (TouchID, FaceID, Windows Hello, YubiKeys)
Inviting Members
Select the team from the Team context dropdown menu at the top of the screen. 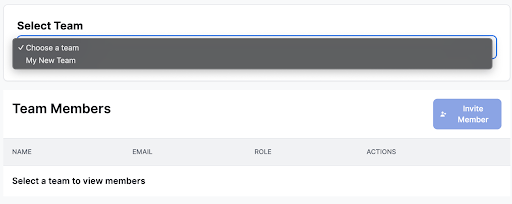
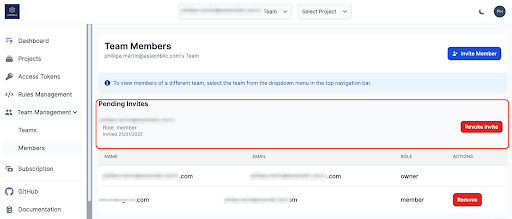
- Navigate to Team Management > Members.
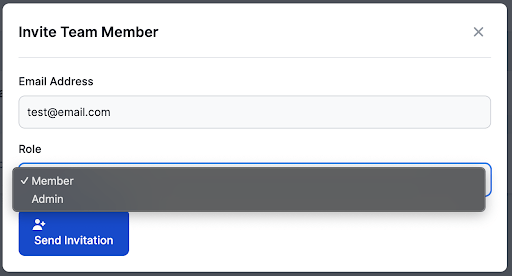
- Click Invite Member.
- Enter their email address and select a role (e.g., Admin, Release Manager or Member).
- Send the invitation.
The user will receive an email with instructions to join your team.
Managing Invites
You can view the status of all sent invitations in the Pending Invites list.
- Revoke: If you sent an invite by mistake or it is no longer needed, you can revoke it immediately using the Revoke Invite button.
Managing Roles
Active team members are listed in the Members table.
- Remove: detailed control to remove a user from the team entirely.
- Manage: Update a user’s role or permissions.
Team member roles
There are four roles in Assemblic: ‘Owner’, ‘Admin’, ‘Release Manager’ and ‘Member’. The table below shows the permissions for each role:
| Permission | Owner | Admin | Release Manager | Member |
|---|---|---|---|---|
| Change team name | — | — | — | |
| Invite team members | — | — | ||
| View team invites | — | — | ||
| Revoke team invites | — | — | ||
| Be removed from team | — | |||
| Remove admin from team | — | — | — | |
| Remove release manager / member from team | — | — | ||
| Have role changed in team | — | |||
| Promote release manager / member to admin | — | — | ||
| Demote admin to release manager / member | — | — | ||
| Create new project | — | — | ||
| Change project name and description | — | — | ||
| Archive or delete project | — | — | — | |
| Create or revoke API token | — | — | ||
| Manage Assemblic subscription | — | — | ||
| Push code to main branch, deploy to production | — | |||
| Manage MFA & Security Settings | — | — | — |
Note: Owners cannot be removed from a team or have their role changed in a team.