Getting Started
Starting your journey with Assemblic is simple. We’ve streamlined the process to take you from sign-up to your first deployed rule engine in minutes.
1. Sign Up
Go to https://app.assemblic.com/ and create a free account. Assemblic uses a secure, passwordless-ready authentication provider to keep your data safe. Once registered and logged in, you’ll be directed to your personal dashboard.
2. The Dashboard
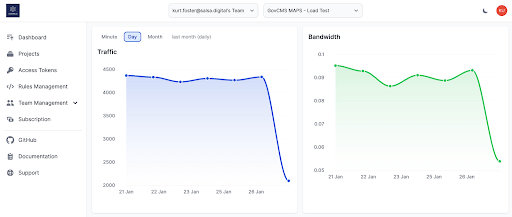
Your dashboard is the command centre for all your Assemblic activities.
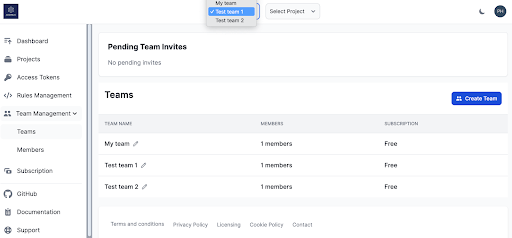
- Context Dropdowns: View and switch between your teams and projects using the dropdowns in the top navigation bar.
- Projects: View and manage your Rules as Code projects.
- Team Management: Invite colleagues and manage permissions.
- Rules Management: Access the web-based Code Editor for your rules.
- Access Tokens: Manage API keys for external integrations.
TIP
Personalise your experience: You can toggle Light/Dark mode using the dedicated theme toggle icon (sun/moon) next to your profile icon in the top right corner.
3. Account Settings
You can manage your personal details by clicking your Profile Icon in the top right.
- Profile: Update your password.
- Settings: Manage your authenticated Git credentials (username and password). You will need these if you choose to clone your projects and develop locally.
4. Subscriptions
Assemblic offers flexible plans to suit your needs.
IMPORTANT
Subscriptions are Team-based. Before adding payment details, ensure you have selected the correct Team from the context dropdown at the very top of the screen.
To view or upgrade your plan:
- Select the desired Team from the top dropdown.
- Select Subscription from the dashboard menu.
- Enter your credit card details to activate a plan for that team.
TIP
For comprehensive details on plans and billing, see Subscription & Billing.
Next Steps
Now that you’re set up, it’s time to build. Head over to Projects and Rules to learn about creating and deploying your rules.